Bored Cook In The Kitchen

Tried and true recipes, new twists on old favorites, and new dishes to expand my family's palate.

Category Archives: Cakes

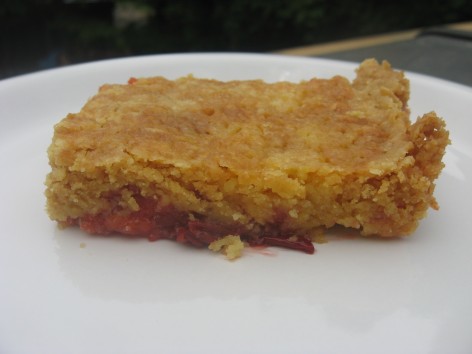
Crumb Topped Coffee Cake

My sister-in-law has made this cake for as long as I can remember and it’s a huge hit in our family.

You can call it Crumb Cake, or you can call it Coffee Cake.  It fits both bills.  Although, there is no actual coffee in this cake, it’s great with a cup of coffee and the crumbs on this cake really make it perfect.  My husband and I have always loved Coffee/Crumb Cake, but you can’t always find the perfect piece.  Often times the cake is thick and dry and the crumb topping is sparse.  To me, the secret to a perfect Crumb Cake is a perfect balance of moist cake underneath, and a thick and buttery crumb topping to adorn it. 

This to me is a nice balance.  Not to mention since you use a boxed cake mix, it’s perfectly easy as well.

There are a few changes I have made from the original recipe as given to me by my sister-in-law.  First, she uses a yellow cake mix.  Which is very good.  I had vanilla cake mix so I used that.  It was just as good.

The other thing she does different is she bakes this in shallow foil pans.  I don’t have the dimensions of the pans she uses, but I would estimate they are probably about 2 inches deep as well, but longer and wider than the one I used.  I know she uses two of these to make one recipe.  I didn’t have these  type of pans, of which I don’t know the measurements, but if I saw them in the store I would know.  The only pan I had was a 13″x9″x2″ pan.  It’s not terrible in this size pan, but I do prefer it in the more shallow one she uses.  It ends up coming out less cake-y and more crumbly, if that makes any sense at all.  Which after reading this last paragraph and all of my convoluted sentences, I wouldn’t blame you if you had no idea what I was talking about.  At this point I’m not even sure if I know.

The recipe I’ve giving below is based on a bake time for the size cake I made in the 13″x9″x2″ pan.  I plan on finding out the exact dimensions of the pans she uses and I will update the recipe once I do. 

Crumb Topped Coffee Cake

  • 1 Box Duncan Hines Moist Vanilla Cake Mix
  • Note:  Mix the cake mix according to the directions on the box, but replace the water with milk.  I used 1%. 

Crumb Topping Ingredients:

  • 3 Sticks of Unsalted Butter, melted
  • 3/4 teaspoon vanilla
  • 3 Cups All Purpose Flour
  • 3/4 – 1 Cup White Sugar
  • 1/4 teaspoon Salt
  • 3 teaspoon Cinnamon
  • 3/4 teaspoon Nutmeg, optional
  • 1/2 cup Chopped Pecans, optional

Preheat oven to 350 degrees.

Mix cake batter according to directions on the box remembering to replace the water with an equal amount of milk.

Grease and flour a 13″ x 9 x 2″ baking dish

Pour batter into prepared baking dish and bake in oven for 15 minutes. 

While cake is baking, melt the butter and add the vanilla extract.  In a separate bowl, mix together the flour, sugar, salt, cinnamon, nutmeg and pecans.  Gradually add the melted butter and vanilla to the flour mixture, stirring well to get it all incorporated.

The flour mixture will be moist and begin to turn somewhat solid. 

After the cake has baked for 20 minutes, remove it from the oven.  When you remove the cake from the oven the center will not be completely baked.  If it’s somewhat soft, you can proceed with the directions from here.  If it’s very jiggly still, put it back in the oven and check it after each additional minute.  You don’t want the middle to be super soft and jiggly or else the weight of the crumb topping will sink to the bottom of the pan.

Break off pieces of the crumb topping and gently cover the top of the cake with it.

After you have the top of the cake covered, return it to the oven and bake until completely done.  My cake baked in my oven on the first round for 22 minutes, then I added the topping and cooked it for an additional 13 minutes.  Every oven will vary, as well as the pan you are using, so watch it and check for it to be done.  When you can insert a toothpick into the center of the cake and have it come out clean it’s done.

Allow to cool and serve with a good cup of coffee.

Coconut Bread

If you love coconut you will absolutely love this moist and delicious coconut quick bread.

If you like coconut, you will absolutely love this moist and delicious coconut quick bread.

There are many food blogs I love to visit that are both mouth-watering and inspiring.  One of these blogs is from Kathy at Polwig.  If you aren’t sure what Polwig means, check out Kathy’s blog and she will tell you.  It’s a brilliant choice for the description of her blog, which features both cooking and raising children.   There is something for everyone, so give her blog a visit.  You won’t be disappointed.

When I was reading her blog a few weeks ago I came across a photo of this Coconut Quick Bread and could not get that recipe out of my brain.  Finally, I made this bread this other day and was not at all disappointed.  It lived up to the mouth-watering picture and turned out easy, perfect, moist and dense.

I’m not going to give you the recipe here, but I will give you the link to Kathy’s site and you can check out how to make this Coconut Bread for yourself. I will tell you the few changes I made.  The recipe originally called for vanilla extract, but I had a bottle of coconut extract so I used that instead.  I also had some pecans just waiting to be used in something, and since I’m a nut for nuts, I added about a 1/2 cup of chopped pecans.  Perfection.

I do have one suggestion when you toast the coconut for this bread.  Actually, two suggestions.  The first one is don’t even think about leaving the oven when you do this.  It goes from toasted to burnt in mere seconds. Literally.  I opened the oven, checked and figured it could go just a “bit” more. I opened the oven 30 seconds later and it was black and burnt to a crisp.  Luckily I had enough coconut to toast a second batch.  This batch I actually stood right next to the oven the entire time turning it and watching it closely.

The second suggestion would be to toast a little extra coconut.  If you are like me you will be eating some of this goodness right out of the oven and wanting to make sure you still have enough for the recipe.  I could have eaten a bowl of just toasted coconut and nothing else.  Consider yourself warned.

This would be a great bread to make for the holidays and package up for gifts.  It’s something different when you think of the typical Banana Nut or Zucchini quick breads.  Which are both equally delicious as well, but the coconut puts a completely different twist on things and makes for something out of the ordinary.

Try it!  We truly enjoyed it!

Thanks, Kathy for sharing a great recipe!

Add to FacebookAdd to DiggAdd to Del.icio.usAdd to StumbleuponAdd to RedditAdd to BlinklistAdd to TwitterAdd to TechnoratiAdd to Yahoo BuzzAdd to Newsvine

Pistachio Cake

I call it Pistachio Cake while the masses call it “Watergate Cake”.  You can do a search online and find it pretty much everywhere, mostly the same recipe, sometimes with a little twist, but nothing too far off the original.  Was there even an original?  Did it really begin during Watergate?  Haven’t researched it but if anyone knows shout it out.  I’m curious to know.

I love this cake because of how simple it is to throw together, how moist it turns out and mostly because if you are a fan of Friendly’s Pistachio Ice Cream, you will love this cake!  To me it tastes just like a bowl of that ice cream.

Here is what I did different from the recipe I originally had for this:

  1. The recipe calls for a “White” boxed cake mix.  The reason?  Because the white cake mix grabs the green color of the pistachio pudding  you add to the cake mix, making it a pretty shade of green upon presentation.  Me, I prefer Vanilla cake mix because it has more flavor so that’s what I use.  I’m not overly concerned with the color being a beautiful green since I’m not planning on inviting leprechaun’s over for dessert. 
  2. The recipes you find online sometimes call for chopped walnuts or pecans.  Here is my beef with that.  The pudding has bits of chopped pistachios in the mix already, and the cake is a pistachio cake.  I would either add chopped pistachios or add chopped cashews, but not sure I would like it as much with the walnuts or pecans. 
  3. I add some coconut to both the frosting and the cake.  I just prefer it, but you can just as easily leave it out and not worry about it effecting the cake.
  4. The recipe I had called to bake this in a Bundt cake pan, but I prefer it in a 9″ x 13″ pan.
  5. I don’t frost the cake after I bake it.  It’s a very moist cake and the frosting tends to make it a little wet if you don’t eat it right away.  So I bake the cake, make the frosting, cover it and leave in the fridge.  Everyone frosts their own piece when they eat it.  The other benefit to this is that my daughter normally prefers her cake without frosting, so this way she won’t have to scrape the frosting off the cake. 

Here’s the recipe I made. 

Pistachio Cake:

  • 1 Box Vanilla (or white) Cake Mix (I used Duncan Hines Moist Deluxe)
  • (1) 3 oz.pkg Instant Pistachio Pudding
  • 3 Large Eggs
  • 1/2 Cup Sweetened & Shredded Coconut (*optional)
  • 1 Cup Soda (Sprite, 7-Up or Mountain Dew)
  • 1 Cup Canola Oil

Pistachio Frosting:

  • (1) 3 oz. Package Pistachio Instant Frosting
  • 2 Cups Cool Whip thawed in the fridge
  • 1 Cup Cold Milk (I used 1%)
  • 1/4 Cup Sweetened and Shredded Coconut (*optional)
  • 1/4 Cup Chopped Pistachios or Cashews to sprinkle over the top (*optional)

Mix all cake  ingredients together well and pour into a greased 9″ x 13″ baking dish.  Bake for 30 to 35 minutes, checking after 25 minutes to see how it looks.  The outside of the cake does get browner than the cake would be if you were just making the regular boxed version, so don’t be concerned.  If  after 25 minutes you see the cake getting too brown you can turn the oven to 325 degrees and cook until done.

Once done allow cake to rest for 5 minutes and then turn out on a dish and allow to cool completely. 

For the frosting, mix Cool Whip, Milk, dry pudding mix, and coconut together until completely combined.  Cover and place in the fridge.

Once the cake is cooled completely you can frost it with the pistachio frosting, or do like I do and leave the frosting in the fridge and the cake plain and just add to each piece when you are ready to eat.  Top the cake and frosting with the chopped nuts if desired.

Enjoy!

Add to FacebookAdd to DiggAdd to Del.icio.usAdd to StumbleuponAdd to RedditAdd to BlinklistAdd to TwitterAdd to TechnoratiAdd to Yahoo BuzzAdd to Newsvine

Delicious Easy Peasy Cherry Crumble Cake

I’ve spoken before about Caveman Cooking and his blog.  If you haven’t visited his blog, you must.  He has some great recipes to share with you, and you will enjoy his delivery of them.  I promise!

Awhile ago he posted the super simple recipe that his wife makes which I featured here today.  I looked at it and thought it looked great but then forgot all about making it.  This happens to me often.  I visit blogs, see something that catches my eye, make a mental note to make it, and then of course because my mental brain capacity is overworked, I forget and never make it.

Lucky for me, Caveman decided to do a recap of some food to fix for Memorial Day and listed this recipe again.  I realized I had all the ingredients for it and decided I was making it!

And as for the ingredients, there are only three!  Yes I said three!  That’s it. They call this recipe Easy Peasy Cherry Crumble Cake.  It lives up to the name of being easy, but it’s missing the “delicious” in the title.

It took me about 2 minutes to throw together, and then forty minutes to bake and it was done.  The end result is fantastic.  Even if you are not a cherry person you will love this!  Two of my kids turned up their noses when they saw the cherry pie filling I used.  Once the dish was made and I took it out of the oven they came in the kitchen asking what smelled so good. 

They each took a wary spoonful, and before you know it, they had a heaping plate of it.  Let me just say that this made a 13 x 9 dish of deliciousness and it was gone in less than 24 hours.

It’s great right out of the oven all hot and bubbly.  It’s great at room temperature.  It’s even great out of the fridge.  There just is no bad way to eat this.  The top of this comes out crisp while underneath it’s moist and creamy. 

Serving this warm with a scoop of vanilla ice cream right on top isn’t a bad idea either.  I refrained from adding this since we didn’t have any vanilla ice cream.  But next time I’m heaping it on!

Head on over to Caveman’s site and see the simple recipe!  Try it and you will fall in love, too!

Birthday and Chocolate Cake


Friday was my 42nd birthday.  Why are the years coming so much faster now when I want to just slow down time?

That being said, my family forgot it was my birthday.   Yes, you heard me correctly.  My. Family. Forgot. It. Was. My. Birthday. 

They did remember when dinner came and after it was over I pulled that chocolate cake out and placed it on the table.  Everyone kind of looked at me oddly when my daughter ran through the kitchen shouting about how we needed candles for the cake. 

I saw the significance of the cake dawn across my husbands face, and in all honesty, I felt bad for him. 

My daughter was the only who knew it was my birthday, because she helped me bake the cake after the boys went off to school and my husband went off to work. 

My husband apologized profusely.  And I really wasn’t mad.  We’ve had a lot going on around here lately, and adding to that my son’s friends mother who died last week.  Being 15 and losing your mother is incomprehensible to me.   So truth be told, forgetting the day of a birth over mourning the end of a life takes priority in my book.

After dinner was over, and my husband apologized again, I told him not to worry about it. 

Then I added:  “It’s, okay.  Really.  Besides, you are going to drop your son off at his friends, then come home and get the other two bathed and ready for bed, read a few stories to your daughter and get them asleep.  While you are doing that, I’ll be at Barnes and Noble, enjoying my coffee, and picking up a few books I’ve wanted to dive into.  Then after that, I’m going to sit int their café, start reading one of the books, sip at my coffee and enjoy my peace.”

I ended that statement with a kiss on his cheek and a little loving tap to it with my hand. 

After devouring a piece of that chocolate cake, that’s exactly what I did.  And enjoyed my alone time immensely.  The coffee wasn’t bad either.

Now, about the cake. 

I saw this cake on Tasty Kitchen and knew immediately I had to save it to my recipe box and make it as soon as possible. 

I’m a chocolate addict, so there was no doubt in my mind this was going to be my birthday cake this year.

The creator of this recipe is Jen from the blog, The Misadventures of Mrs. B .  She has a really cute blog and I’ve begun checking it often.  Check out her recipe for this cake Chocolate Pudding Cake with Truffle Frosting and she will walk you step by step through the recipe.  Your mouth will be watering for a chocolate indulgence by the time you are through, I promise!

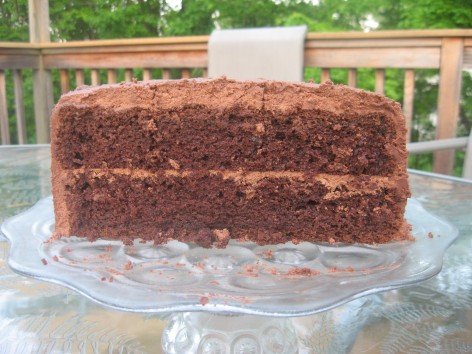
This cake is a chocolate lovers dream.  And it’s versatile, depending on the type of chocolate lover you are.  Dark, semi sweet, milk chocolate, you make the call.  I used semi sweet chocolate for the frosting and it was truly rich and delicious.  But milk chocolate would have been just as great. 

It was dense, moist and creamy.  And there is not a piece left.  Happy Birthday to me!

Chocolate Pudding Cake with Truffle Frosting:

Recipe from Tasty Kitchen posted by Jen of The Misadventures of Mrs. B

  • Butter, To Grease Cake Pans
  • Cocoa Powder Or Sugar, To Dust Cake Pans
  • 1 box (18 To 20 Oz. Box) Chocolate Cake Mix
  • 1 box Instant Chocolate Pudding (5.9 Oz)
  • 1 cup Sour Cream
  • 4 whole Eggs Beaten
  • 1 cup Vegetable Oil
  • ½ cups Warm Water
  • 2 cups Heavy Cream
  • ¼ cups Light Corn Syrup
  • 8 ounces, weight Semisweet Chocolate, Chopped Or Chips

Preheat oven to 350 degrees.

Prepare two 9-inch cake pans with butter and cocoa powder (or flour, if you have no cocoa).

Combine cake mix, pudding, sour cream, eggs, oil and warm water in a large bowl. Stir until combined, then beat for 2 minutes on medium speed.

The batter is THICK! Divide between your two pans and spread/shake pans to distribute batter evenly. Bake for 33 minutes in your preheated oven and allow to cool thoroughly.

While you’re baking your cake, start your frosting! Combine cream and corn syrup in a medium saucepan and heat until barely simmering. Turn heat to low and add the chocolate, whisking until totally melted and smooth. Transfer chocolate mixture to a large bowl and place in the fridge or freezer until cold.

When the cake is totally cooled and chocolate is very cold, whip the chocolate cream until stiff. Frost cake and ENJOY!